If you’re a veteran planning to buy or sell a home using a VA loan in 2025, there’s one critical step you shouldn’t overlook: the VA appraisal (often referred to as the VA loan inspection).
This process isn’t just about confirming your home’s market value—it’s also about making sure the property meets the VA Minimum Property Requirements (MPRs). These standards help ensure your new home is safe, structurally sound, and ready for comfortable living.
In this guide, we’ll walk you through everything you need to know about VA loan inspection requirements.
Whether you’re a first-time veteran homebuyer or a seller helping a veteran, these steps will save you time, money, and stress on your journey to homeownership.

What Are VA Loan Inspection Requirements?
The VA inspection—officially known as the VA appraisal—evaluates both a home’s value and its condition. VA appraisers check if the property meets VA Minimum Property Requirements (MPRs) to ensure it’s safe, structurally secure, and livable.
Details for Veterans:
- A VA appraisal typically costs between $400–$600 and is usually completed in 10–14 days.
- It’s not the same as a standard home inspection (which is optional but strongly recommended). The VA appraisal focuses on MPRs, whereas a home inspection can reveal extra details about a property’s overall condition.
- As a veteran homebuyer, you get to enjoy unique protections under the VA loan program. These MPRs are designed to prevent you from buying a home with hidden issues like major roof leaks or serious pest problems.
For the official list of MPRs and more information, check out VA.gov Home Loan Resources.
Key VA Minimum Property Requirements (MPRs)
MPRs outline the basic safety, structural, and sanitary conditions a home must meet for a VA loan.
Essential Points:
- Safety: The home must not pose any hazards (e.g., operational smoke detectors, stable stairs, clear exits).
- Structural Integrity: The roof, foundation, and walls must be in good shape—no active leaks, major cracks, or serious defects.
- Utilities: The home must have working heating, water, and electrical systems, with reliable year-round access.
- Sanitary Conditions: The property should be free from mold, pests, or sewage issues.
Real Example: A San Antonio property failed the VA appraisal due to termite damage. After a $2,000 pest treatment, it passed. This underscores the importance of ensuring a pest-free environment before scheduling the VA inspection.
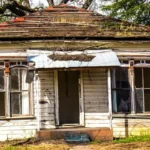
Step 1: Assess Your Home’s Condition
Before you schedule the VA appraisal, do a thorough walkthrough of your home to identify any obvious issues.
How to Do It:
- Create a Checklist: You can download a property checklist from VA.gov or ask your real estate agent for one.
- Check Each Room: Look for leaks, cracks, missing fixtures, or faulty wiring.
- Inspect Exterior Areas: Don’t forget crawl spaces, decks, siding, and the roof.
Veteran Tip: A veteran seller in Texas caught a cracked siding issue during a routine self-inspection, saving time and money by addressing it before the VA appraiser’s visit.
Step 2: Fix Structural and Safety Issues
Tackle major problems first—like roof leaks, foundation cracks, and safety hazards.
Key Areas to Address:
- Roof: Ensure it’s leak-free and has a 5+ year remaining lifespan. Replacements can run $5,000–$10,000.
- Foundation: Repair cracks or uneven areas. Professional fixes typically cost $1,000–$3,000.
- Safety Features: Install handrails on stairs and check smoke detectors. These minor fixes often cost $50–$200.
Real Example: One veteran seller replaced a rotted deck for $3,500 and passed the VA appraisal immediately afterward. Tackling these bigger-ticket items early can save your entire deal.
Step 3: Ensure Utilities and Systems Work
All home systems—heating, cooling, plumbing, and electrical—must function properly.
Action Items:
- HVAC: Service or replace non-working units. Repairs can cost $500–$2,000, while full replacements might be $5,000+.
- Water Heater: Check for leaks or rust. Minor fixes typically range from $300–$800.
- Electrical: Test all outlets and switches. Repair any exposed wiring or faulty circuits (around $100–$500).
Real Example: A home in Helotes, Texas, initially failed due to a broken furnace. A $1,200 repair turned that failure into a speedy approval.
Step 4: Address Cosmetic and Exterior Needs
Cosmetic issues might seem small, but peeling paint or an untidy yard can raise red flags for a VA appraiser.
Best Practices:
- Paint: Repaint areas with peeling paint, especially if the home was built before 1978 (to address possible lead paint concerns). A full paint job can cost $1,000–$3,000.
- Landscaping: Mow the lawn, trim overgrown bushes, and remove yard debris ($50–$200).
- Pest Control: If you spot termites or rodents, schedule a treatment right away ($500–$2,000).
Real Example: A seller spent $800 on painting to cover suspected lead paint and breezed through the VA appraisal afterward.
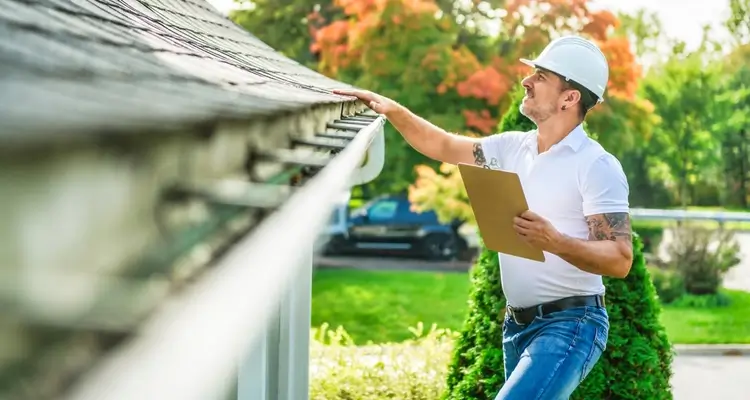
Step 5: Schedule the VA Appraisal
Once your home is ready, it’s time to schedule the official VA appraisal.
How It Works:
- Contact Your Lender: They’ll arrange the VA appraiser’s visit.
- Be Available: It helps if someone is there to answer questions or provide proof of recent repairs.
- Review the Report: If it’s a pass, you’re good to go. If there are still issues, fix them and request a re-inspection (usually $100–$200).
Veteran Buyer Story: One veteran buyer paid $450 for an appraisal but had already addressed roof repairs in advance. The appraisal sailed through without delays.
Common VA Inspection Pitfalls and Fixes
| Issue | Why It Fails | Fix | Estimated Cost |
|---|---|---|---|
| Leaky Roof | Water damage risk | Replace/Repair | $5,000–$10,000 |
| Broken HVAC | No heat—unlivable | Fix or Replace | $500–$5,000+ |
| Peeling Paint | Possible lead paint hazard | Repaint | $1,000–$3,000 |
| Termites | Structural threat | Pest Treatment | $500–$2,000 |
| No Handrails | Safety violation | Install | $50–$200 |
Veteran Tip: Mold issues can also cause a deal to fall through. One seller lost a buyer due to mold, but a $1,500 cleanup solved the problem and led to a successful VA loan approval for the next interested veteran.
FAQs About VA Loan Inspection Requirements
What are VA loan inspection requirements in 2025?
VA loan inspection requirements ensure the home meets MPRs for safety, structural integrity, utilities, and sanitation. The VA appraisal looks beyond the home’s value to confirm it’s suitable for you and your family.
How do I prepare my home for a VA appraisal?
Focus on major structural elements (roof, foundation), ensure utilities (HVAC, water, electric) function, and address any safety issues or pest problems.
What if my home fails a VA inspection?
You can make the required repairs and then request a re-inspection. Typical re-inspection fees range from $100–$200.
Are VA appraisals stricter than regular appraisals?
Generally, yes. The VA’s MPRs are meant to protect veterans by ensuring they’re investing in safe and livable homes. Conventional loans may not require fixes for issues like peeling paint or minor repairs.
Can I sell a fixer-upper with a VA loan?
It’s possible, but the property must still meet MPRs. Some veterans use specialized renovation loans (like VA renovation loans) to tackle bigger fixes, but it’s more complex than a straightforward VA loan.
How much does a VA appraisal cost in 2025?
Expect to pay between $400–$600, depending on your location. Turnaround times are about 10–14 days.
Do VA loans require a separate home inspection?
A home inspection isn’t required but is highly recommended. It provides a more detailed look at the home’s condition than the VA appraisal alone.
What’s the most common reason for failing a VA inspection?
Roof issues are a top culprit. Water damage or an aging roof can be deal-breakers if not addressed before the appraisal.
Summary and Key Takeaways
Proper preparation can help your home pass the VA appraisal, saving you time, money, and frustration.
Key Points for Veterans:
- Don’t Skip Self-Checks: Use a checklist from VA.gov to catch issues early.
- Address Critical Repairs: Focus on roof, foundation, HVAC, and pests first.
- Keep It Simple: Even minor fixes like painting and yard cleanup can influence the VA appraiser’s overall impression.
- Plan Your Timing: The VA appraisal takes about 10–14 days, so schedule well in advance of closing.
- Stay Informed: Check out our [VA Loan Benefits Guide](internal link placeholder) for more tips on using your veteran benefits to make the homebuying process smoother.
Prep Checklist
| Task | Action | Cost Range | Timeframe |
|---|---|---|---|
| Assess Condition | Walk through home with a checklist | $0 | 1–2 hours |
| Fix Structure | Repair roof, foundation, safety issues | $1,000–$10,000 | 1–2 weeks |
| Check Utilities | Test HVAC, water, and electric systems | $500–$5,000 | 2–5 days |
| Cosmetic Cleanup | Repaint, tidy yard, ensure no pest issues | $50–$3,000 | 1–3 days |
| Schedule Appraisal | Book via lender | $400–$600 | 10–14 days |
By following this step-by-step roadmap, you’ll set yourself up for a stress-free VA appraisal experience.
As a veteran, you’ve earned the benefits that come with a VA loan—these requirements are designed to protect you and ensure your new home is one you can truly enjoy. Good luck, and thank you for your service!
For more information on VA loan programs, visit VA.gov or contact your state’s veteran affairs office. If you need more personalized guidance, contact us to be referred to a realtor and lender experienced in VA loans.